
Lunt Etalons are precision crafted at our manufacturing facility in Tucson, Arizona.
We start with precision cut UV grade Fused Silica blanks that we purchase from a glass supplier in Massachusetts.
We use UV grade due to the higher specifications that UV grade material has for reduced bubbles and striae. Both of which would negatively effect the performance of the finished etalon. UV grade costs more but we believe that high quality materials result in a superior product.
Step 1: Beveling and Grinding

Both edges of the blanks are beveled to avoid future chipping while polishing. Chipping of the edge would cause scratches in the surface of the etalon plate which would require a trip back to the grinding room.
Both surfaces of the blank are ground to a fine finish to get them ready for polish. The slicing of the raw material leaves structure in the surface of the blank that need to be removed prior to polish. Polishing these plates is a slow process and removing surface defects later would take far too long.
Depending on the size of the bank this process can take several hours to a full day.
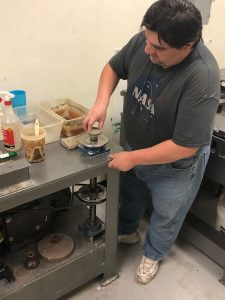
David runs the grinding area. He wears many hats.


Step 2: Moving to the Polishing Shop
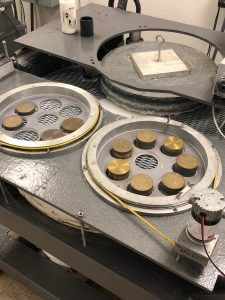
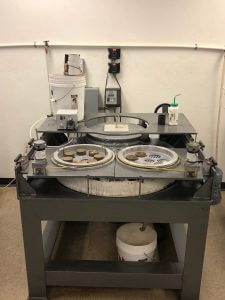
After a thorough cleaning to remove residual grinding compound the blanks are moved to the Polishing Shop. Lunt currently have 6 Continuous Polishers running. Each polisher is set up for a specific size of parts. Typically, we run parts from 35mm OD to 140mm OD. Our polishing machines are custom built and specific to the processes that we use to produce the precision flats needed for our etalons.
The blanks are grey when they first go on the laps. It typically takes 8-10 hours (per side) of continuous polishing to remove the grey and get to a high polish. Larger blanks can take up to 4 days to get to the polished out state.
From here we start the monitoring of the laps to drive the surface of the plates to precision flat. The plates are sitting face down on and optical “pitch” surface. This pitch surface has been grooved to allow the uniform flow of polishing compound across the entire surface of the lap.
The pitch is a proprietary blend of fine pitch and other additives that make our laps super hard and very slow moving. Lunt are not in the fast/high speed polish business that typically produces bird shaped 1/4 wave surfaces with rolled off edges. Our surfaces are 1/40 wave or better to within a % of the edge. It should be noted that the edge of the plate is where the “feet” (more on them later) will be optically contacted and any roll would make contacting difficult and unreliable, and also difficult to hold the plates uniformly spaced. (I have spoken to issues with uniformity of etalon spacer layers and their effect on bandwidth performance in other blogs).
Weights are placed on the back of the plates to aid in the polishing process, we need to ensure good contact with the lap. The plates slowly take on the shape of the lap, as the lap changes shape from concave to convex the plates take on a mirror of that shape. In order to drive the lap’s shape we use a large counterweight that is moved in and out of the lap. In order to drive the lap concave the counterweight is moved in, applying more weight and wear to the inner portion of the lap. In order to drive the lap convex, we move the weight out. It’s a careful and skilled balance of movement and time. Move too fast and the lap is both convex and concave at the same time, generally rolling the edges of the plates. Slow and steady is the best method. The key is to get the lap slowing passing through from concave to convex (or visa versa) and catch the plates at the very point the lap (and they) are flat.
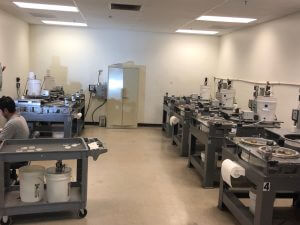
The polishing room is climate controlled to +/- 2 degrees F at 72F. It’s a nice place to work in the hot Tucson summers..
Step 3: Finishing the Plates
When the etalon plates are close they will be taken off the lap (many times) and measured against each other (double the visual error) in a specialized hood. This hood has a proprietary multiple wavelength test system that allows us to see up to 2X the surface error of conventional hoods. If you are familiar with conventional flats, you will know that the test process typically removes, tilt, spherical errors, and some other higher orders. The result is a poor looking bird shaped fringe with heavily rolled off edges with a claimed specification of 1/4 or 1/6th wave… Industrial flats that are anything but flat.
Lunt do not remove any of these functions from our testing and rely 100% on the raw data.
We have produced 0.007″ thick optical windows for various labs that have a transmitted wavefront of better than 100th wave over the entire 70mm aperture by these methods.


The image above shows 2 fringes crossing the plates. These fringes represent the interference of the light at the interface of the 2 etalon plates. The accuracy of this test ensures the quality and performance of the finished etalon. The straighter the fringes, the flatter the plates. As you can see, the fringes are perfectly linear all the way to the edge. Our processes produce the most precise flats in the world. We have NO need for a center foot to push or pull our plates flat.
From this point the plates are fully inspected under a bright light source to check for internal imperfections and to making sure the surfaces are 100% polished out. They are then cleaned and serialized and head to the coating facility.